How to Upload Existing Project to Overleaf
How to use Overleaf + Git to manage your TeX file
Overleaf is an online TeX editor with a lot of functionality. Nearly importantly for me, multiple persons can work on the same file at the same fourth dimension, so information technology is ideal for collaboration. All the same non all people like to write TeX inside the browser; many have their own preferred editor (TeXShop for instance). Here I'd similar to explain how to utilize your TeX editor to work with Overleaf. Edits made with the method here will exist availabe via the ordinary Overleaf interface, so any of your collaborator who prefers to use Overleaf directly can proceed to practice so. An added bonus is that you take a articulate view of all the changes made by every collaborator. For this y'all need to apply something called git.
(The owner of the Overleaf projection needs to be a paid member to utilize this feature. I think Overleaf is worth supporting, and so please become a paid member, or ask your senior collaborator to do so.)

"git" is a protocol which allows many people to piece of work on the same project consisting of multiple text-based files. This protocol "git" was developed by Linus Torvalds, the original programmer of Linux, so that the many developers of Linux all over the world can work together. TeX is also text-based and git can handle it. There are many advantages:
- If multiple persons make off-line changes on dissimilar parts of the file, git automatically merges the changes. So, multiple authors can work on unlike sections of a TeX file at the same time.
- If multiple person make different changes on the same line of the file, git notifies you saying that at that place is a "disharmonize", and inquire you what to do.
- Also, who did which changes to the files are all easily visible with git every bit already shown above, so yous don't have to tell your collaborators which part you edited.
Overleaf adopts git, so everything I said applies to overleaf. The bones steps to use git are:
- For multiple persons to piece of work on a projection with git, starting time y'all need to have an on-line "git repository".
- And so each person needs to clone the repository, which creates a local off-line copy of it.
- You so work on the local files as usual (e.m. apply TeXShop for TeX.)
- Once you're satisfied with your local change, you commit it to your local repository.
- Y'all then button information technology to the on-line repository.
- You can obtain other people'due south changes by pulling the change from the repository to the local copy. One point to notation is that, depending on your editor, you might need to close the file in your editor before pulling the changes. This is because pulling the change modifies the files on the disk directly, and not all editors automatically pick up on-disk changes to an already open file.
"git" is originally a command-line app, only of course at that place are many graphical user interface for that. Hither I volition apply GitHub Desktop. So please download and install it. On the first launch, information technology will ask yous if you want to create a GitHub account. If y'all but use it with Overleaf, you don't demand to create 1, so you can skip this step.
(The relation among git, GitHub, GitHub Desktop is somewhat confusing. git is a general protocol. GitHub is a very popular service which provides online git repositories. GitHub Desktop is a free GUI app created by GitHub which allows you to manipulate git repositories non necessarily hosted on GitHub. Here we're going to utilise GitHub Desktop simply as a GUI app to manipulate our git repositories, and so you don't need any account on GitHub.)
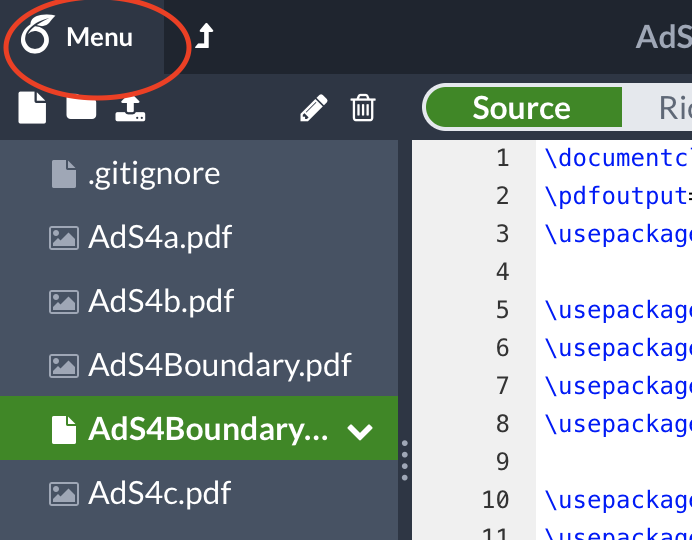
Let united states now clone an Overleaf project. For this, you need to open a projection in the Overleaf website. Please click the carte icon in the height-left corner:
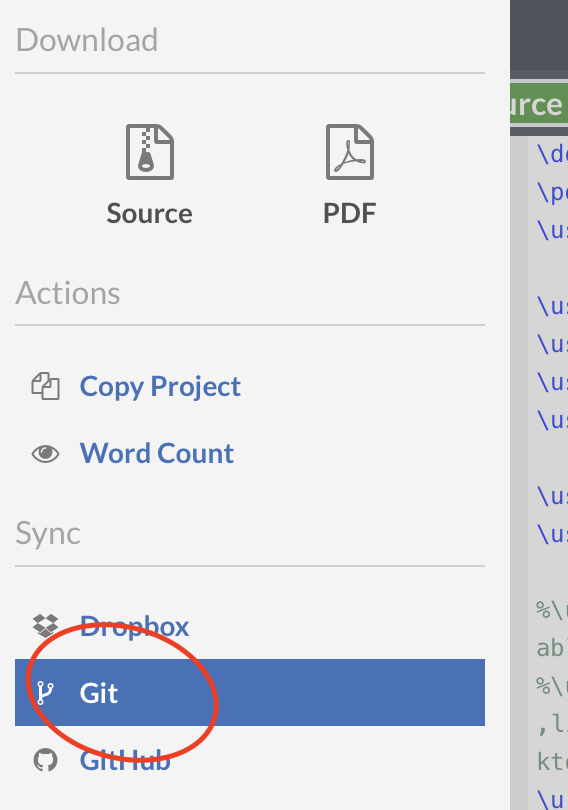
So click the button saying "git":
This volition bear witness an URL of the class https://git.overleaf.com/XXXXXXXXXX where the part XXXXXXXX depends on the project. Now you open the GitHub Desktop. From its menu, select "Clone a repository". You will and then see something like this:
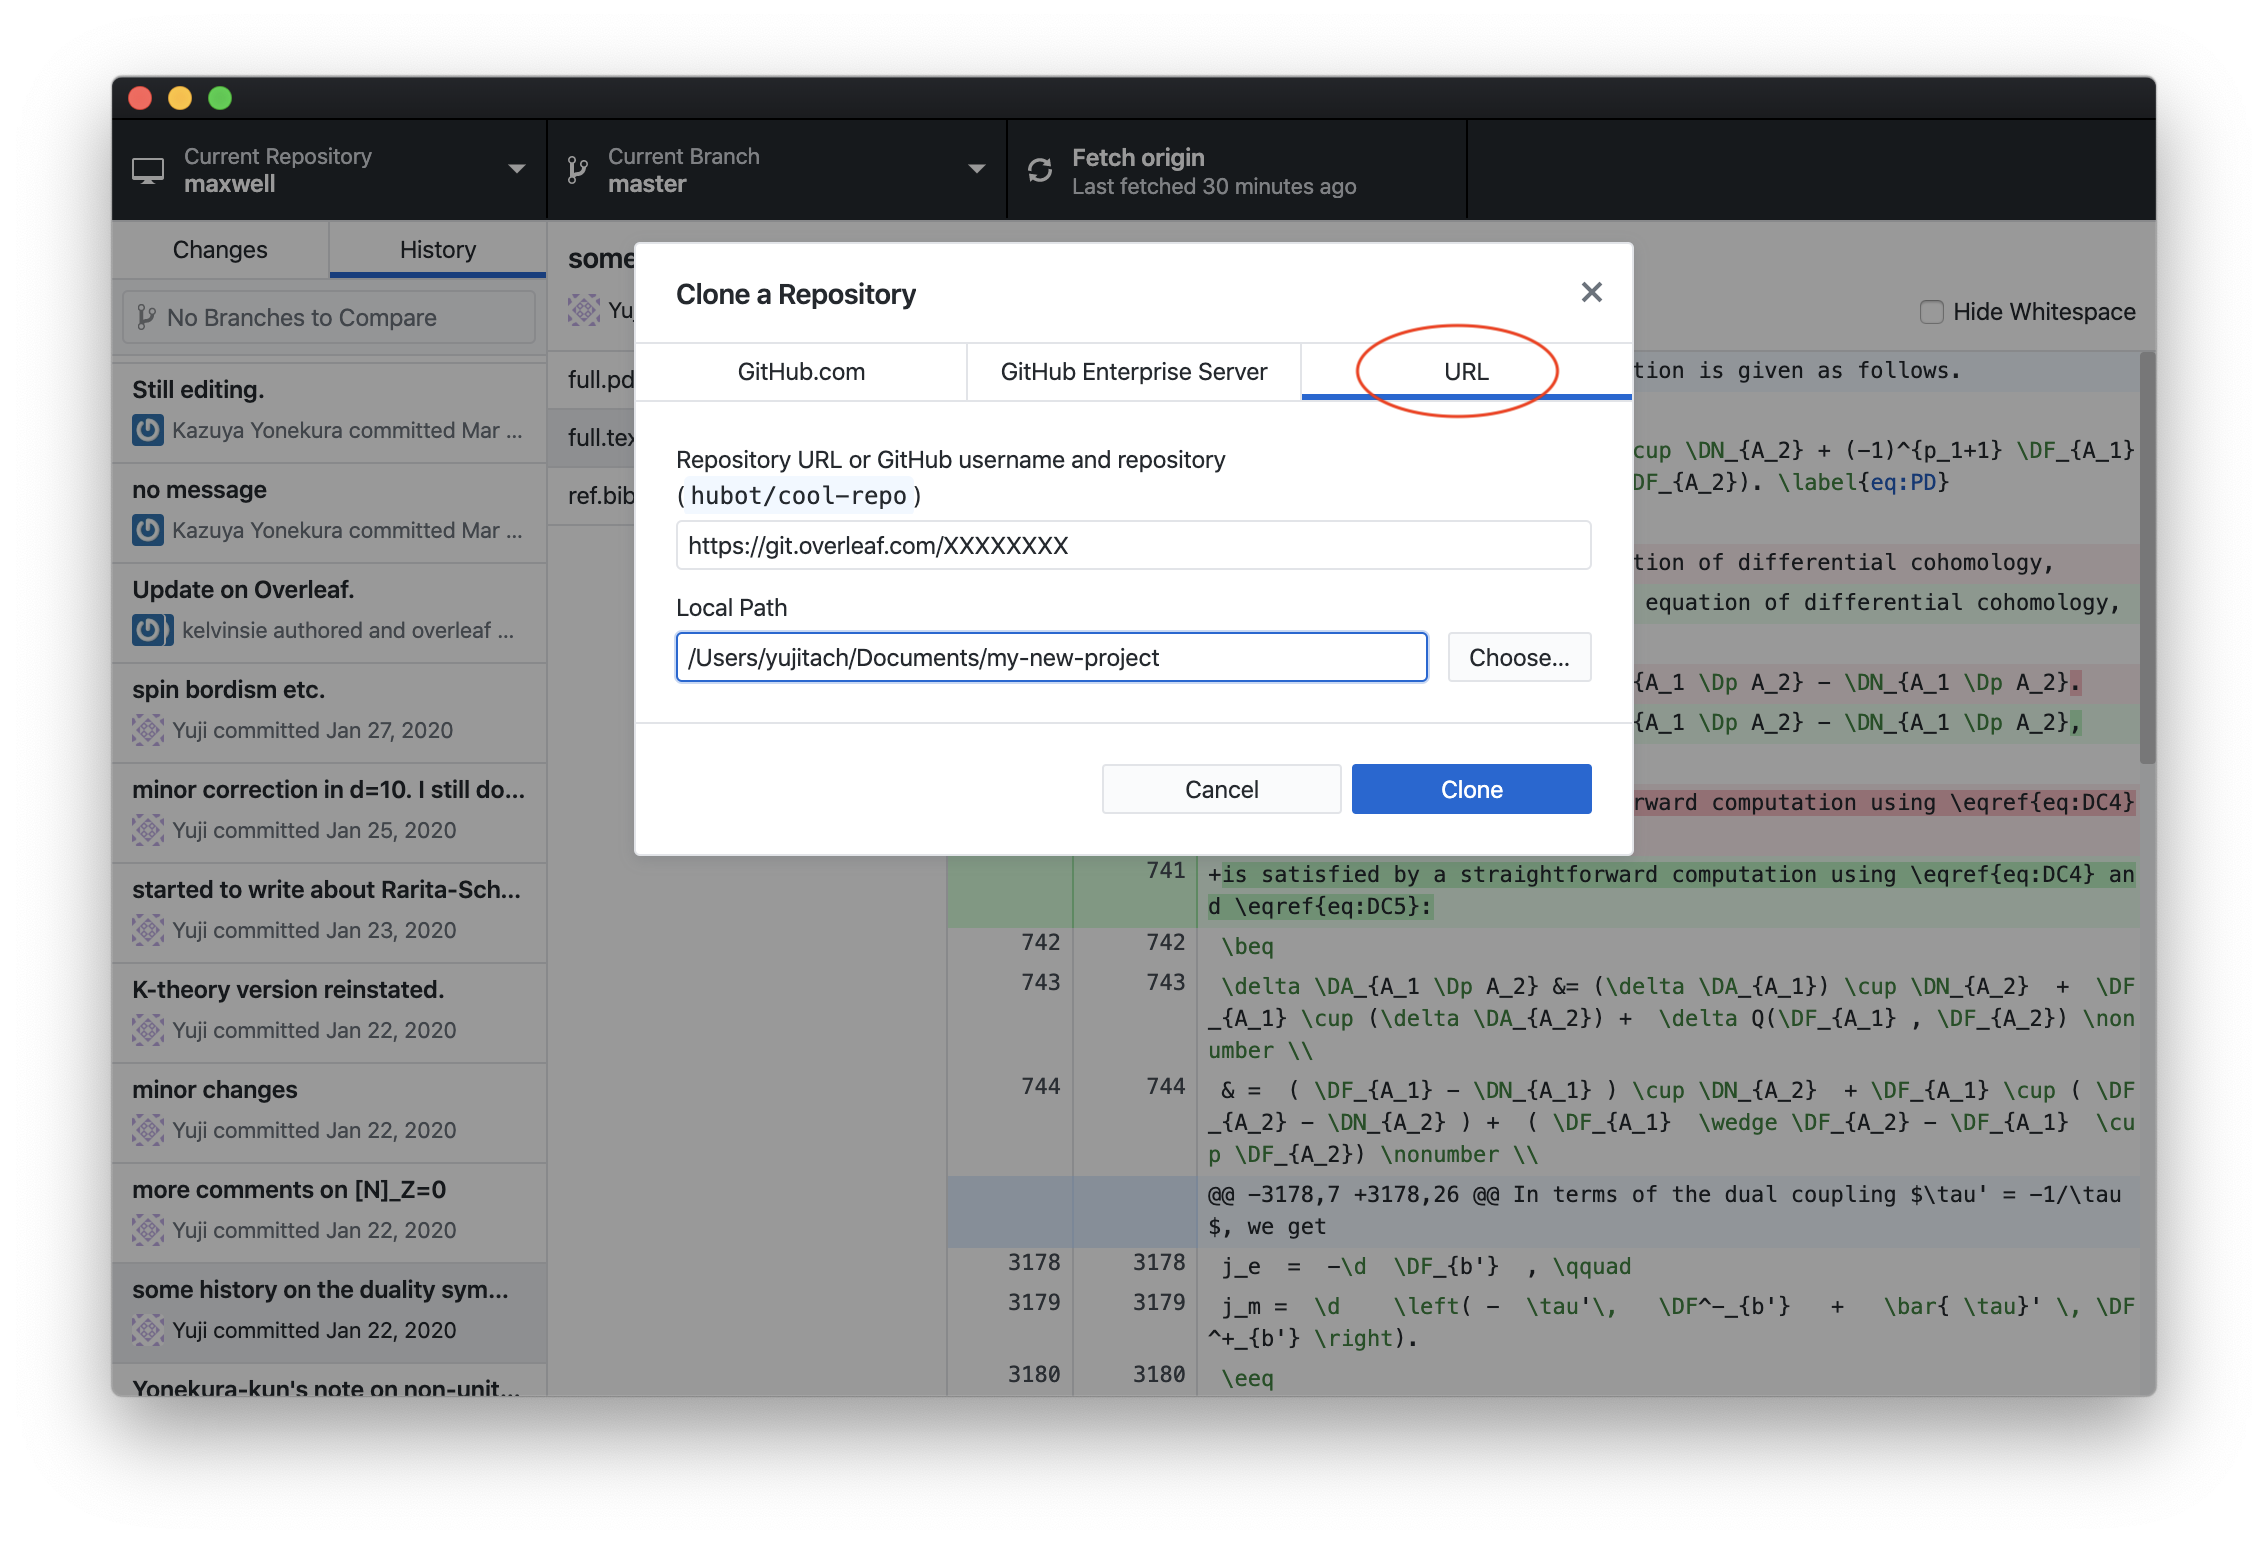
You cull the third tab saying "URL", and paste the URL given by Overleaf into it. You also need to choose the folder to put the TeX files. Now click "clone". This will ask you your Overleaf account and the password, which you need to provide only once.
Now information technology's basically done. Please open the folder yous simply selected; you'll find the TeX and associated files. Now you can work on the TeX file. Once you lot worked on a paragraph or so, you tin can commit information technology. To do so, get to the "Changes" tab of GitHub desktop:
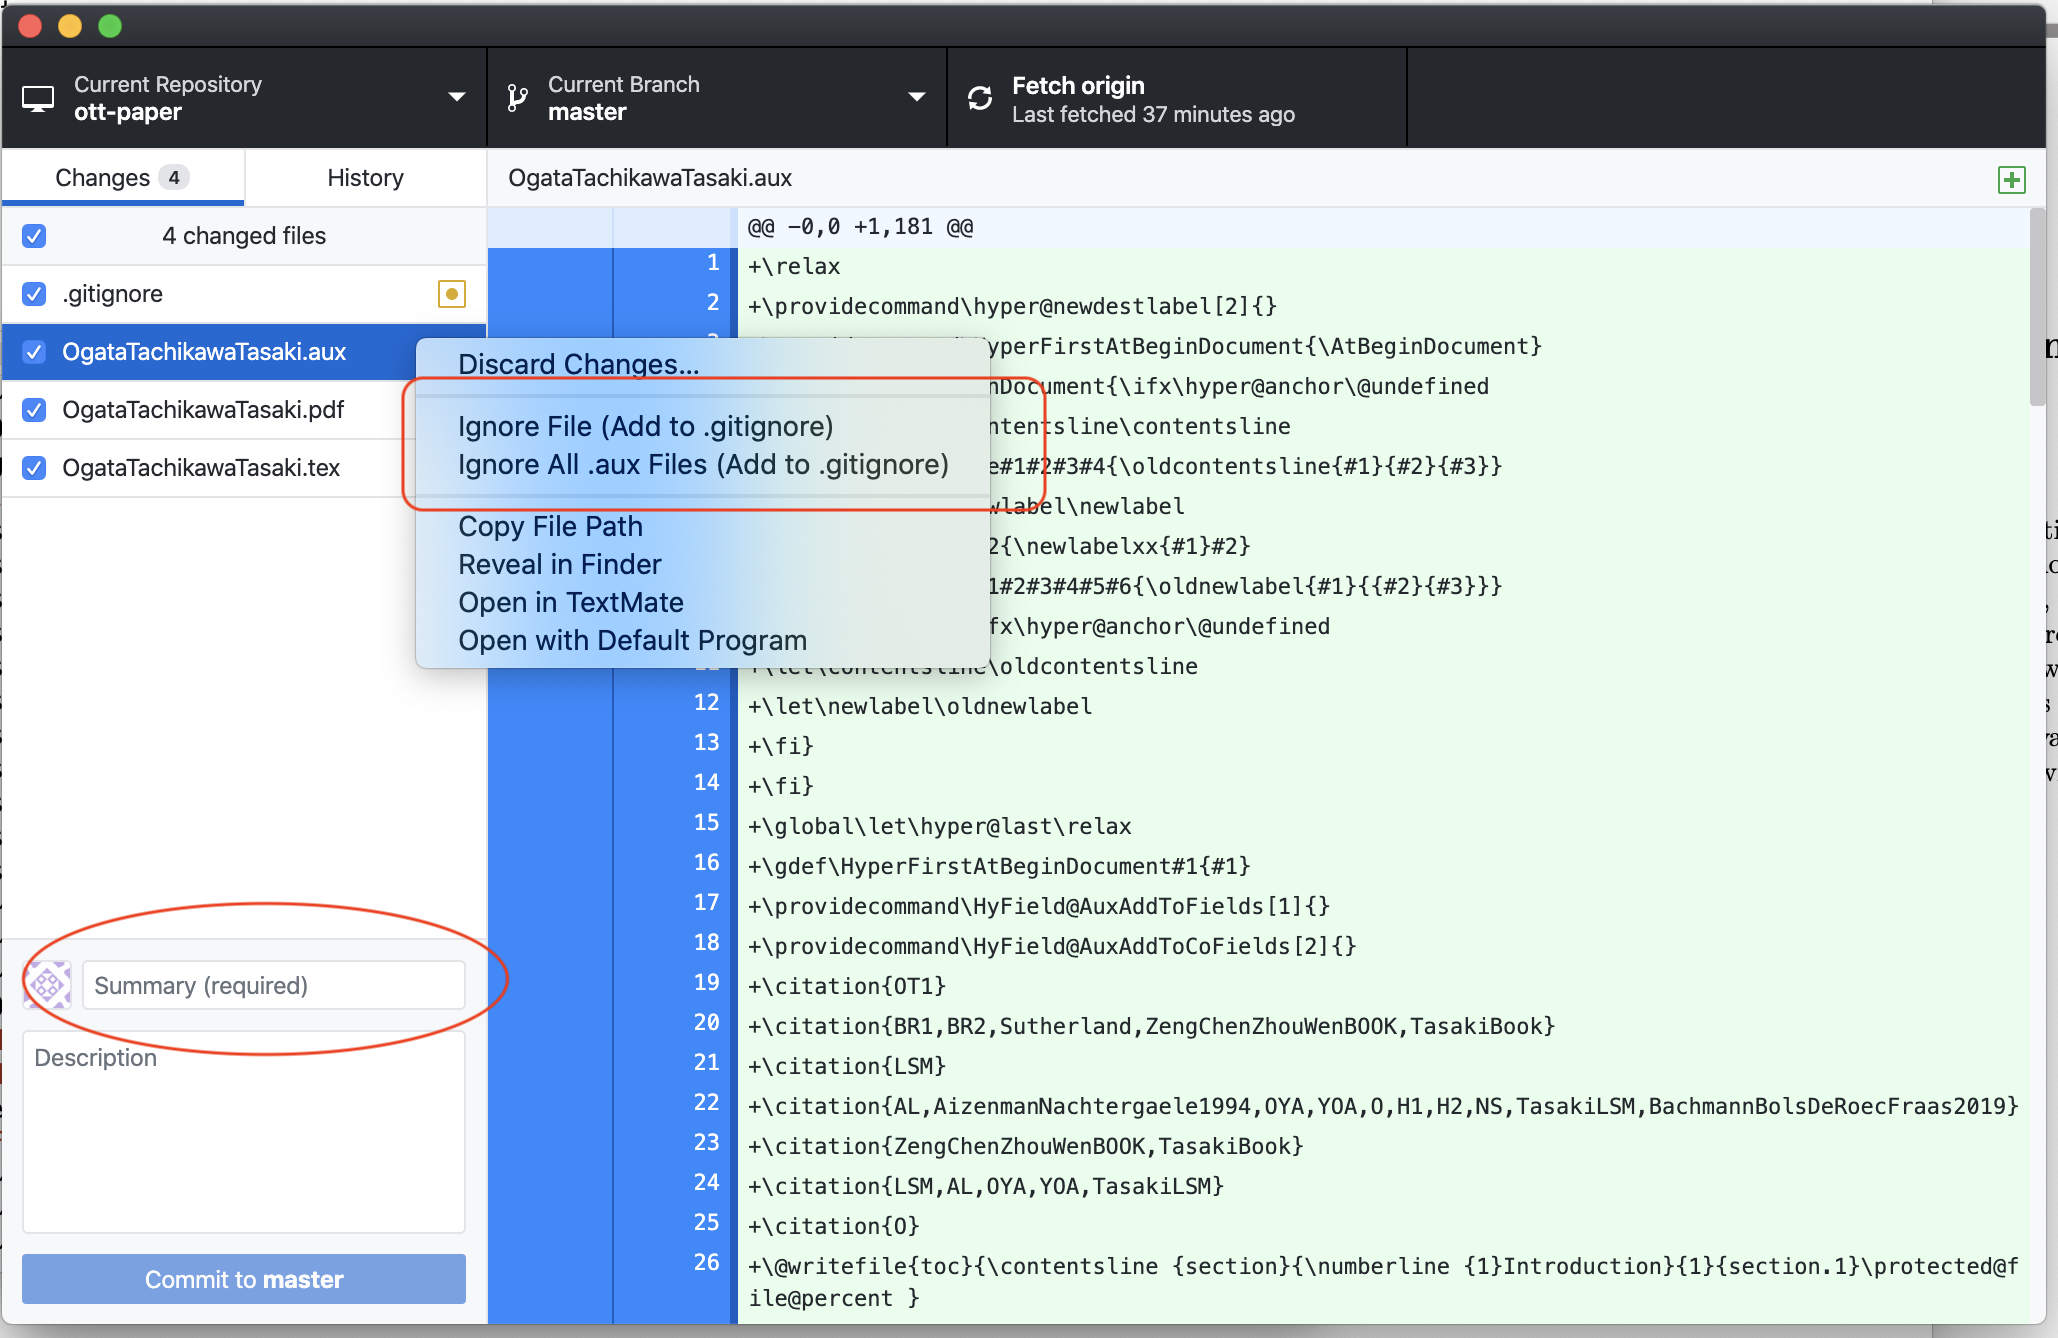
Often, at that place are files you don't accept to commit, such as .aux files. For these, you employ the context menu to tell git to ignore them. Then, you demand to type in a brusk summary (such as "Section 3.1 half done."). Y'all can then click the commit button to relieve information technology to the local repository. GitHub desktop will then ask you lot if you desire to "push" it, i.e. to upload information technology to the online repository, which you probably would like to.
When you restart working on a file, before opening the editor, please come back to GitHub desktop, and click the "Fetch origin" push in the top part of the window. If new changes by other collaborators are available, the button contains a smaller "pull" button to get the changes.
I'll be happy to give more details if y'all're stuck at some betoken, and then please don't hesitate to ask me.
Source: https://member.ipmu.jp/yuji.tachikawa/misc/overleaf-git.html
Post a Comment for "How to Upload Existing Project to Overleaf"